How to Use Microsoft SharePoint in Business
Microsoft SharePoint offers more than just document storage and management. You can also create tasks or projects and manage all the variables that come with these in just one application.

How to Create/Manage Project Task in Microsoft SharePoint
With Microsoft SharePoint, you can improve productivity and achieve collaborative goals online. These steps will help you create or manage project tasks using this application:
-
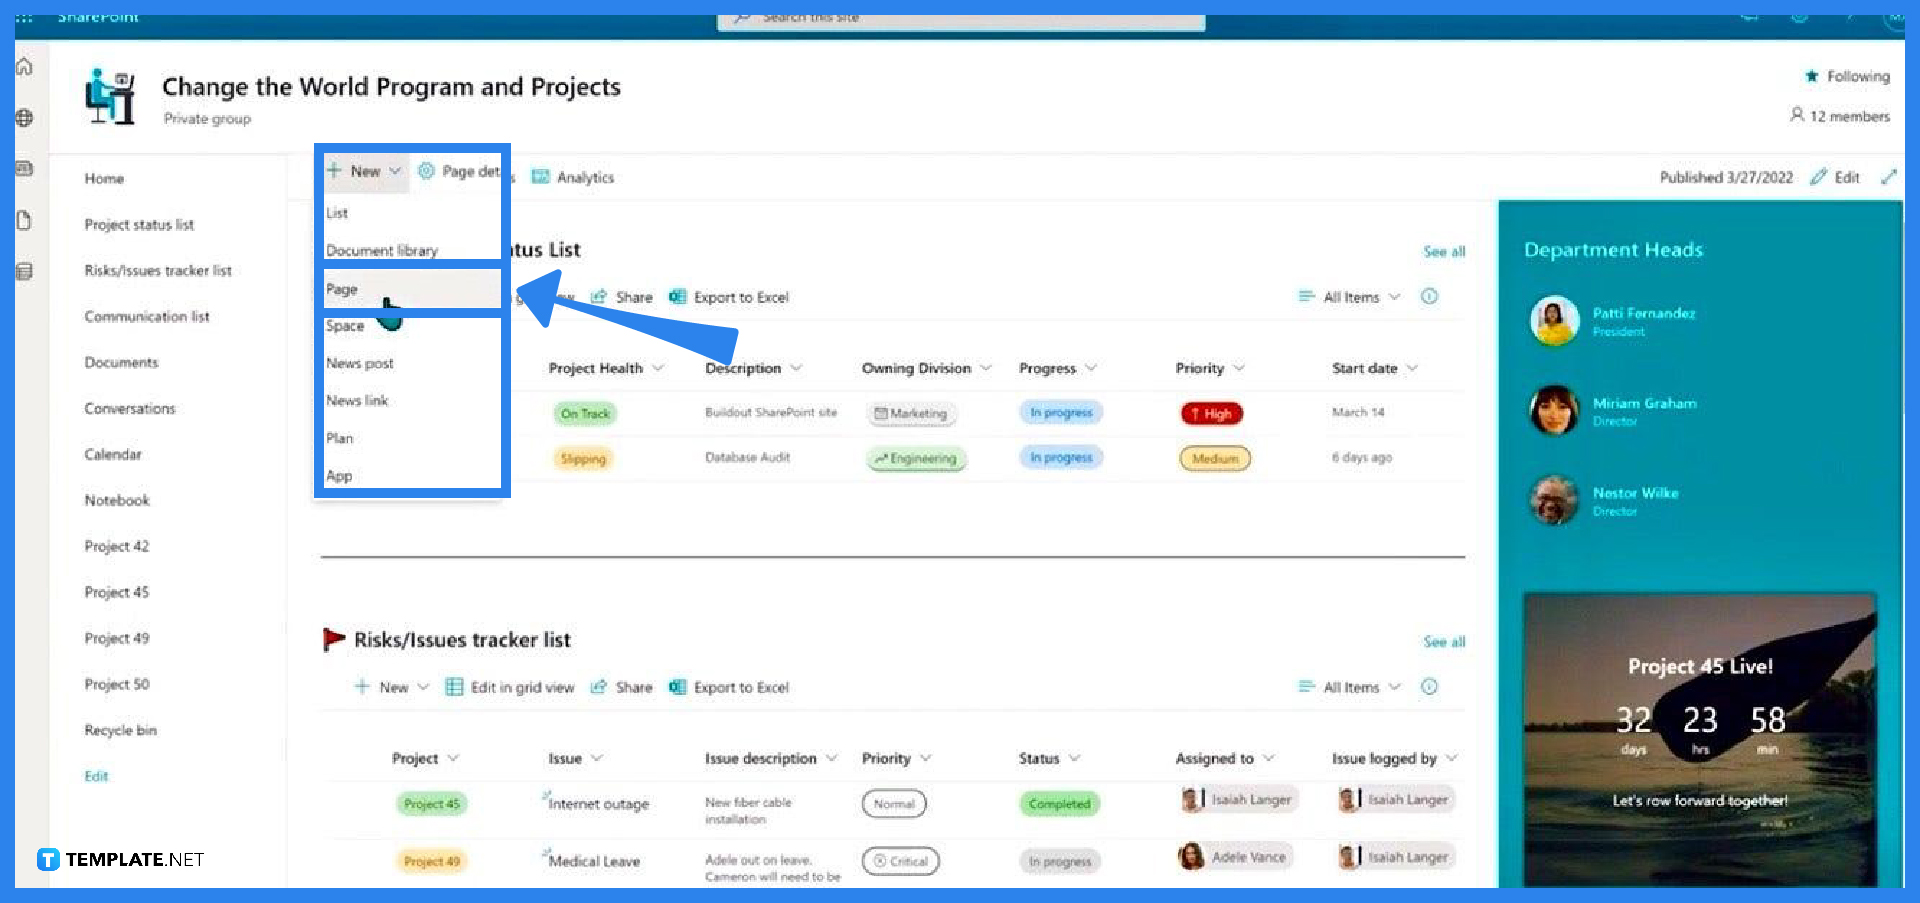
Step 1: Create New Page or Project

The first thing to do to create a new project, presuming that you already have a team site, is to go to the home page of your site and click New in the task bar above, then click Add Page (in this case, Page and Project could mean the same). This will direct you to the home page of the project where you can edit or design by adding web parts. The web parts are customizable so that they will accommodate the needs of the project and these parts include the planner board, document library, schedule, and communication thread among others.
-
Step 2: Add Planner Board
On the home page of the project, you can add sections or web parts and one of these is the planner board. The planner board allows the site owners and the members to see the tasks under the project that need to be accomplished and the persons assigned to execute these tasks. Although there are other layout options such as a grid, the planner board is more convenient.
-
Step 3: Add Schedule Section
Adding a schedule section makes sense since this is a project after all. Here, you can add an event related to the project with its arranged schedule, location, and even the people within the team who are involved. You can also filter what events would show on the project’s home page, whether the ones from the whole site or the ones that are only on the particular project.
-
Step 4: Add Document Library
Putting a document library section allows the members and the site owner to attach or upload files that are relevant to the accomplishment of the project. You can add folders to organize the files per category or per task. Moreover, you can edit this web part and add an identifier such as a project status to determine if the project the documents belong to is completed or not.
-
Step 5: Publish or Save Draft
When all the web parts are added and the project details are basically provided, the site owner can now publish the page. Publishing in SharePoint means that all the updates that the administrator made will be shown to all the members connected or added to the Team site. On the other hand, saving a draft means making updates on the page but the members can’t see it in the meantime.
FAQs
How to edit the details on the web parts?
Click the web part that you want to edit—this will highlight that section in green and show buttons on the left side with the edit button at the top.
How to make a new project appear on the navigation?
To make a new project appear on the navigation area, click the Setting button in the upper right corner of the site’s home page then select Site Contents; next, select Site Pages and look for the project you just made and click the yellow icon next the project’s name and click Republish.
Why is Microsoft SharePoint useful in managing project tasks?
The convenience and functionality of Microsoft SharePoint are what make the application useful in managing project tasks and projects in general.
How to rename a project?
On the navigation area, click the ellipses beside the project’s name and then click Edit.
How to see a specific task on the planner board?
To see a specific task on the planner board, just click the arrow beside Filter and choose how you would like to filter or see the tasks displayed on the planner board.

