How to Change Name/Status on Microsoft Teams
Microsoft Teams is a social collaboration software that allows its users to interact with each other, which is similar to most social media software, albeit a bit more formal. This means that users of Microsoft Teams will have a digital avatar and name that will represent the user in Microsoft Teams.

How to Change Name/Status on Microsoft Teams
The user’s profile in Microsoft Teams is composed of the name and status of the user. The name in this context represents the tag or label the user has when they present themselves in Microsoft Teams, while the status indicates the current state of the user while they are using Microsoft Teams.
-
Step 1 – Launch Microsoft Teams on the User’s Desktop
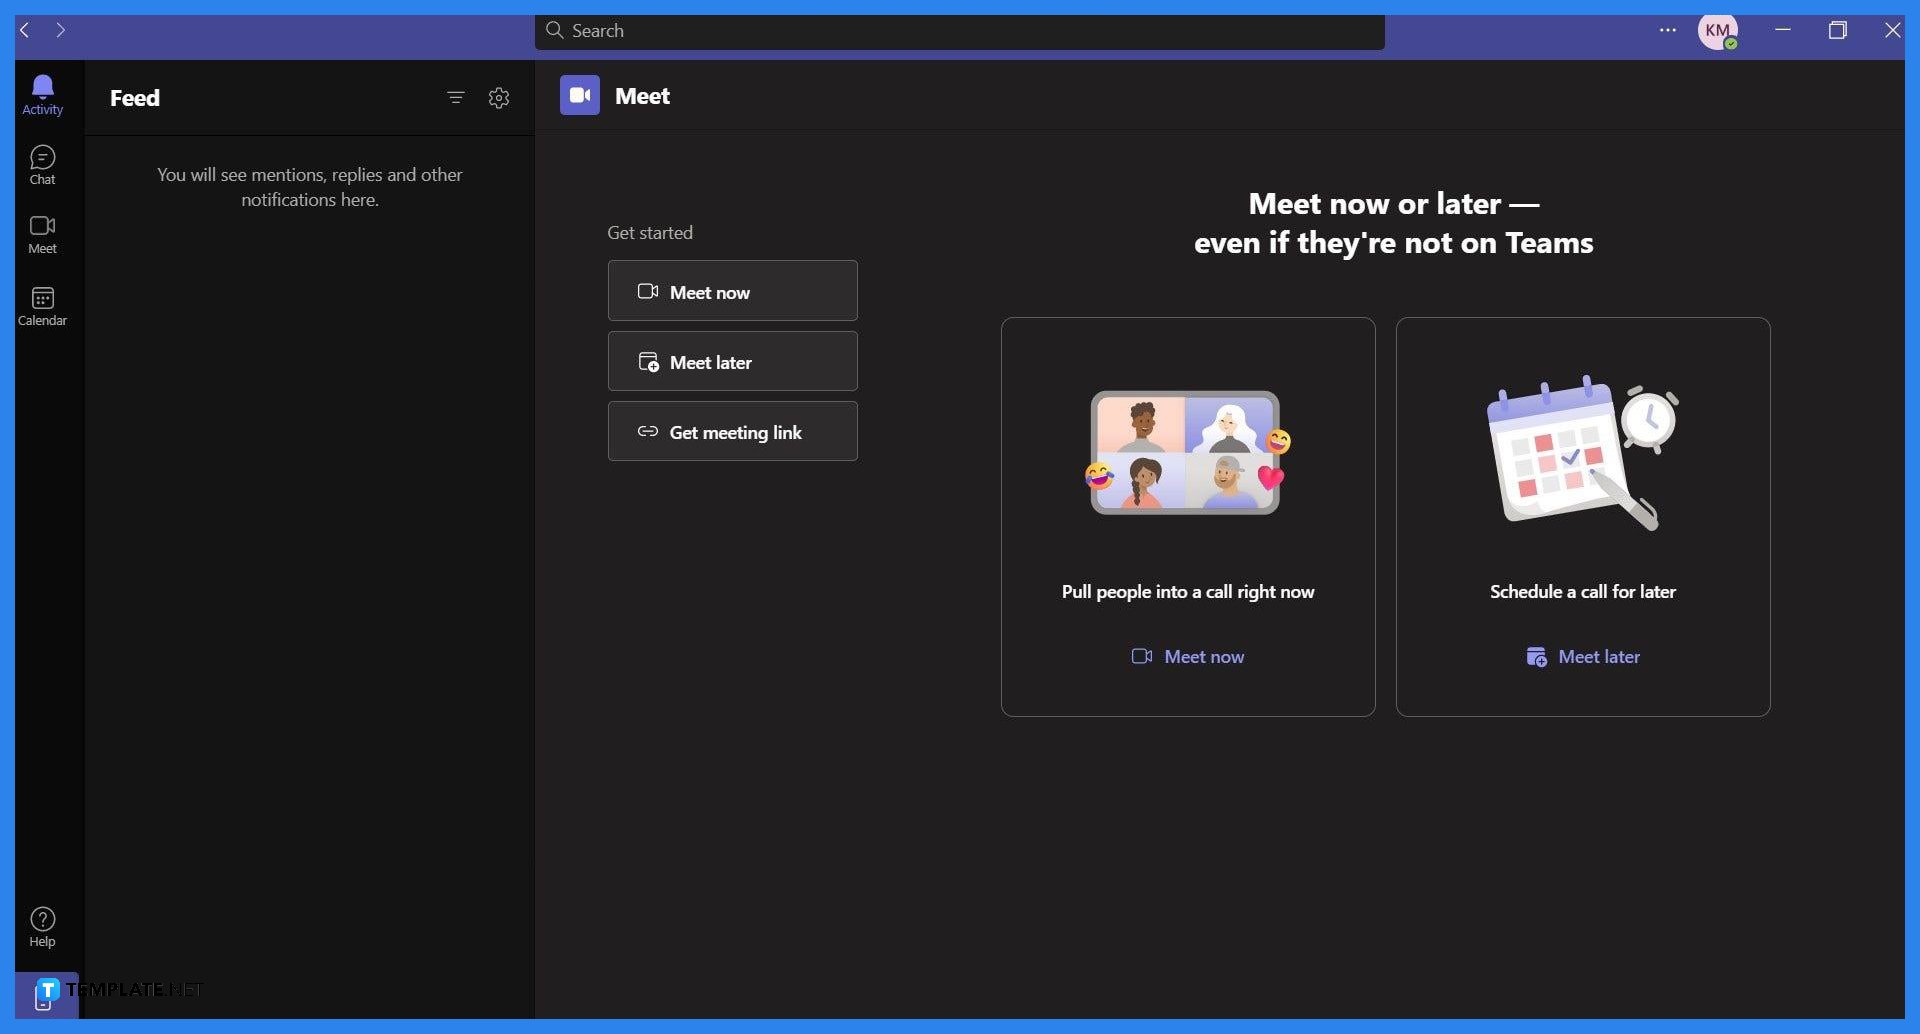
The ability to change the user’s profile name and status in Microsoft Teams is present in all versions of Microsoft Teams. Begin by opening Microsoft Teams by double-clicking the shortcut on the desktop or web browser.
-
Step 2 – Open the Profile Dropdown
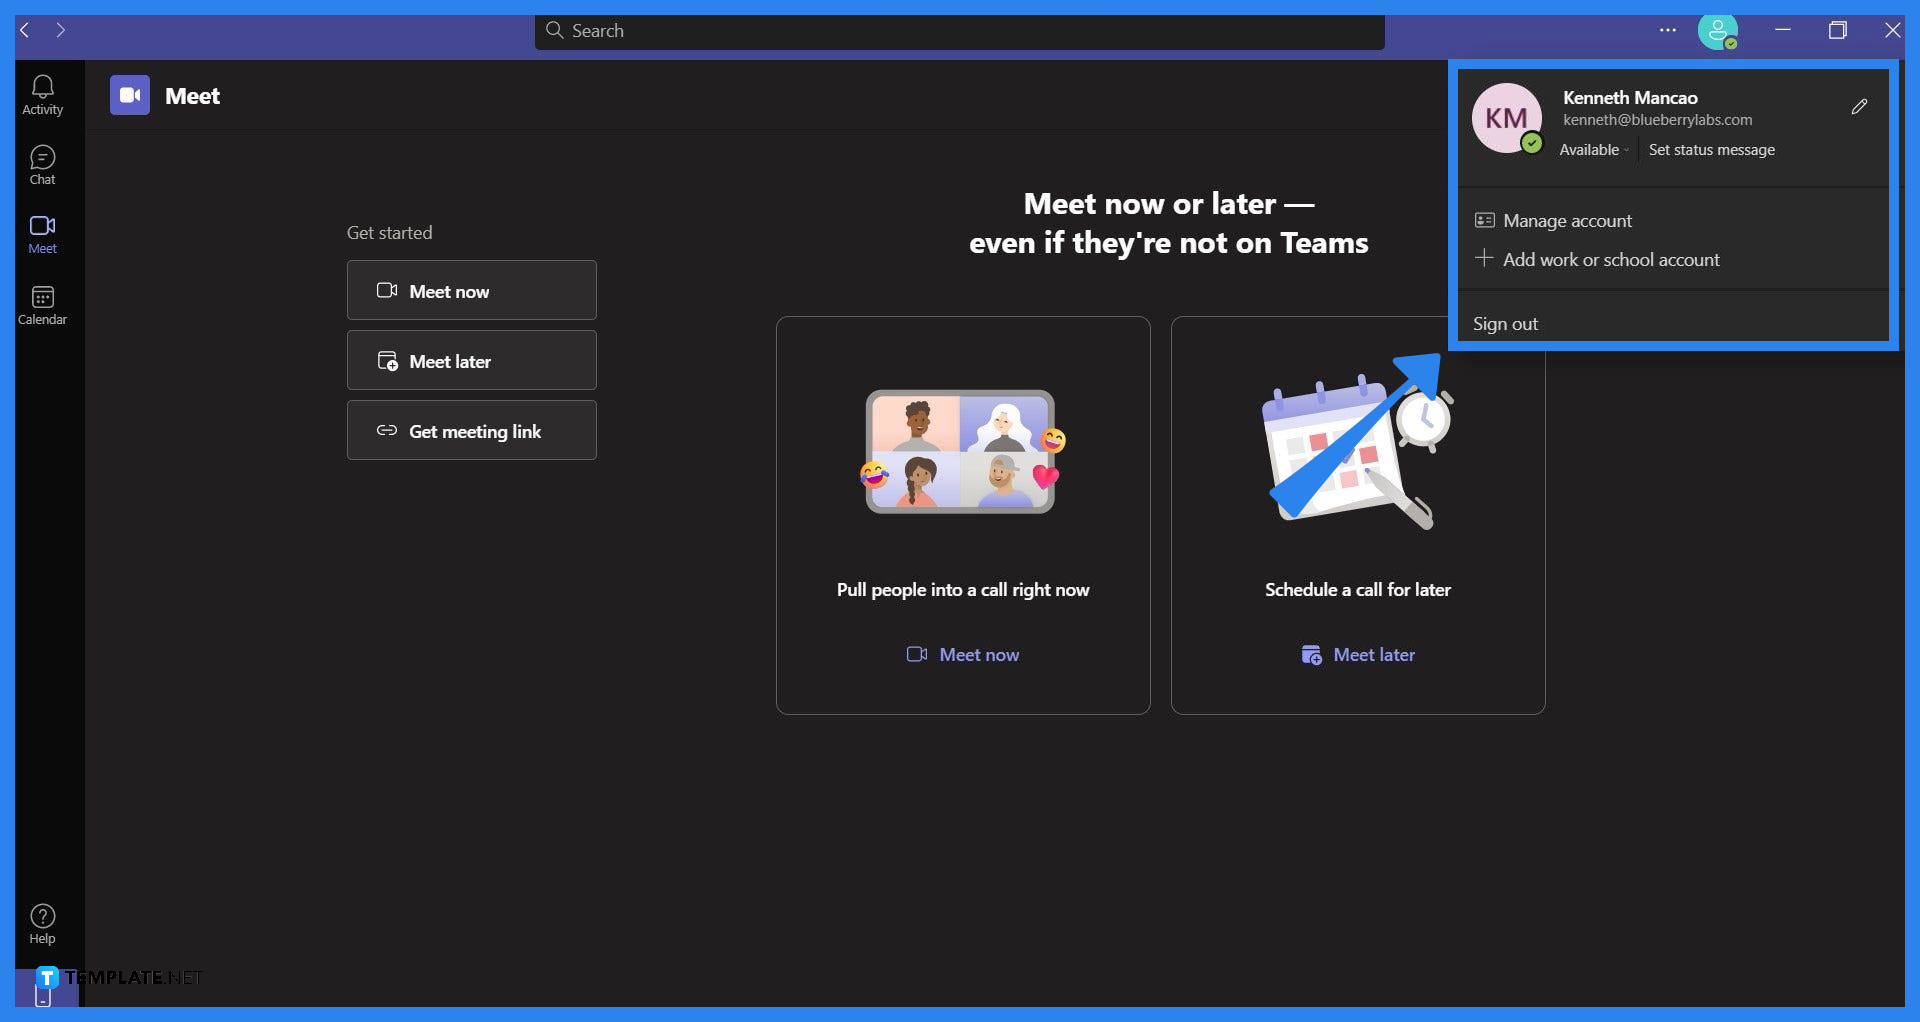
The Profile dropdown contains all the tools the user can utilize—whether to edit or manipulate their Microsoft Teams profile. To open this dropdown, the user must click their profile icon on the upper right corner of the window.
-
Step 3a – Open the Profile Description Window
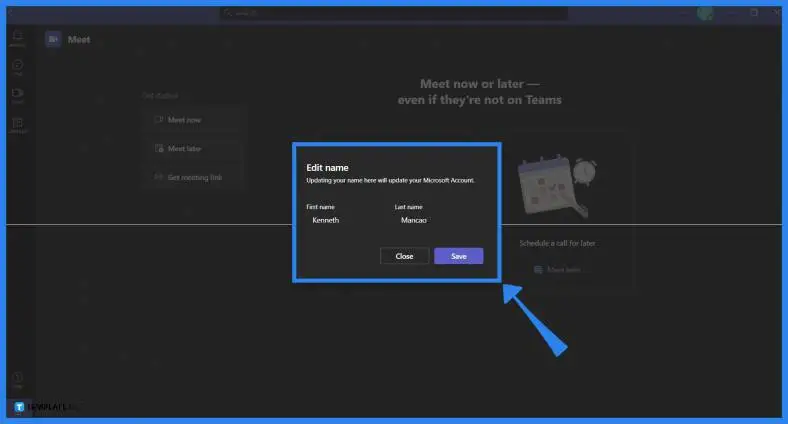
The Profile Description window allows the user to manage their names and contact information inside Microsoft Teams. The user must click their account name on the Profile dropdown to open this window.
-
Step 4a – Edit the User’s Name
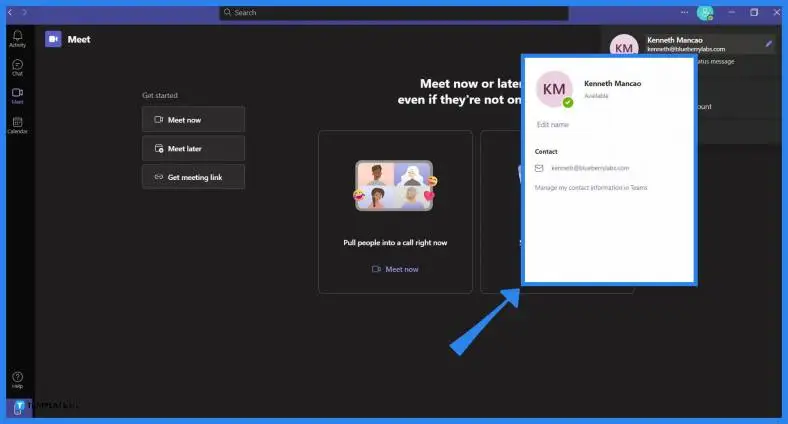
By clicking the “Edit Name” button on the Profile Description Window, Microsoft Teams will prompt the user with a separate window where they may change their first and last name in their profile. The user must change or edit their first and last name with the desired outcome, and then select save to finalize the change.
-
Step 3b – Set Status Message
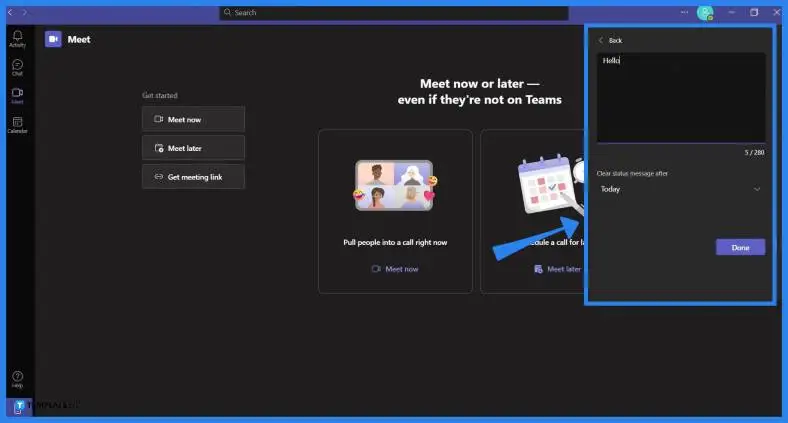
The user can access the Set Status Message view on their profile dropdown by pressing the “Set status message” button. Here the user can write and type out a status message to have on their Microsoft Teams profile.
-
Step 4b – Choose Status Durations
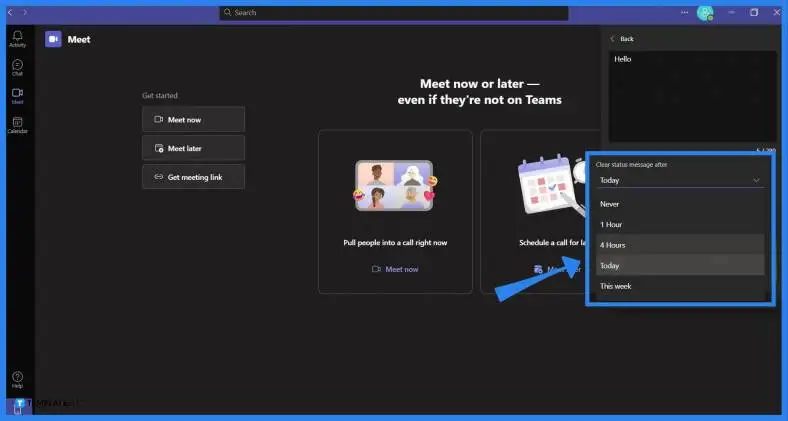
After the user has typed out a message, they will need to set a specific timeframe or duration for their status message. Toggle the list by clicking it and selecting a timeframe for the user’s status. Then, they must press the “Done” button to finalize and save their status message.
FAQs
How often can you change your name in Microsoft Teams?
Microsoft Teams and Microsoft Office allow the user to have complete freedom and agency on how they present themselves on Microsoft Teams; this means that there is no limit on how much the user can change the name attached to their Microsoft Office account.
When you change your name in Microsoft Teams, will this reflect on my Microsoft Office Account?
Microsoft Teams uses the information the user has provided on their Microsoft Office account to create the user’s Microsoft Teams profile, which means that any changes or manipulations done on the user’s Microsoft Teams profile will respectively reflect on said user’s Microsoft Office account.
After changing either my name or status in Microsoft Teams, how quickly will my changes reflect in Microsoft Teams?
Any changes in name and status in Microsoft Teams will immediately reflect on Microsoft Teams; the only caveat is that this is highly dependent on the internet connection of the user as it can affect how fast the information is transmitted to the server of Microsoft Office.
How many times can I change my status in Microsoft Teams?
You may change your status as many times as you would like in Microsoft Teams as this action is not policed in any way, shape, or form by the software; just note that even if your status message is not policed, this doesn’t mean the admins of your Team will not regulate or police your status.
Can I set a timer to clear my custom status in Microsoft Teams?
Yes, the user can set a timer to allow Microsoft Teams to automatically clear your status after a specific period.

