How to Make a Letterhead: Step-by-Step Guide
How to Make a Letterhead: Step-by-Step Guide
-
Step 1: Open a Document Creation App
Document creation apps are the most user-friendly tools for creating letterheads. Among those that we recommend are Google Docs and MS Word. Open your preferred document creation app and start a blank document.

-
Step 2: Insert a Header in Your Blank Document

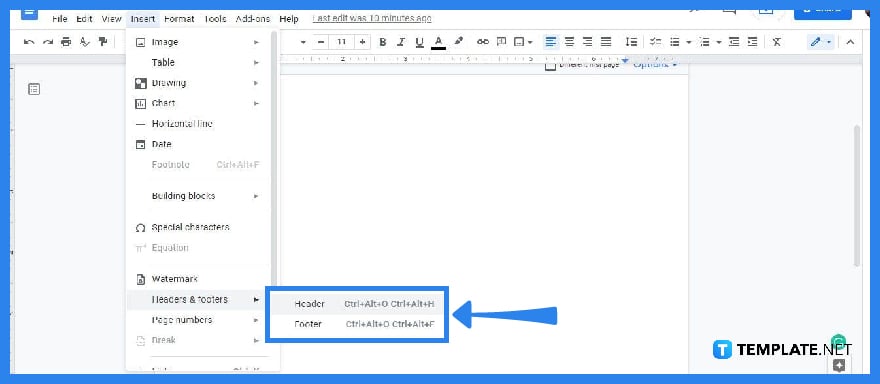
To insert a header in your document, simply go to the Insert menu. Look for Headers & Footers and hover your cursor over the arrow next to it. A small menu will appear containing the Header and Footer option. Click Header.
-
Step 3: Input Your Company Information

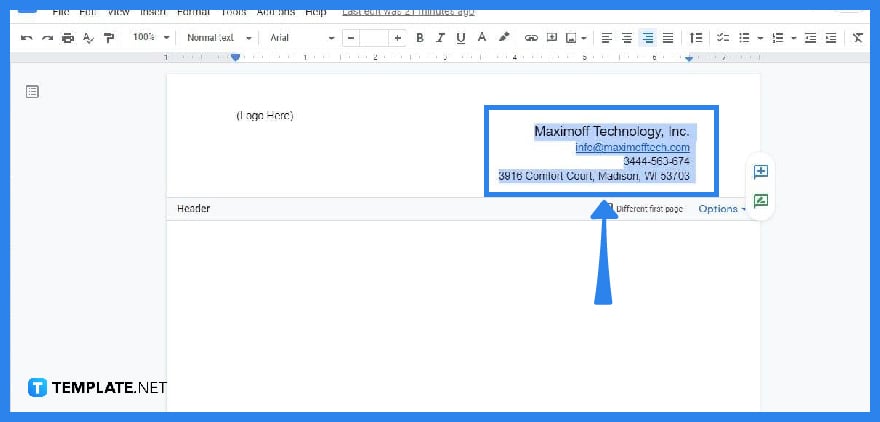
Once the header space is established, you can start inputting your company information. Make sure to include your company name, address, phone number, and contact number. You can position them in the center, left, or right side of the header.
-
Step 4: Add Your Official Company Logo

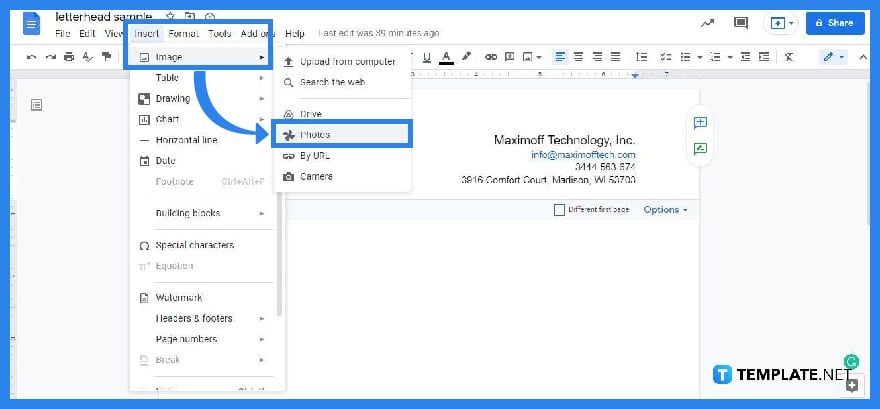
Next, add your official company logo. You can add it by going to Insert. Select either Image or Drawing, depending on whether your logo is saved as an image or as a drawing/illustration. Place the logo in a good spot. It can be next to the company name or on the other side of the header.
Can I reuse my letterhead?
Yes, you can. The letterhead you created can serve as a template. You can use it again for future documents. Just make sure to have a copy of it and save it in your storage or to the cloud.
Can I add letterheads in Gmail?
Yes, you can add letterheads in Gmail and make them appear in your emails. Save your letterhead as an image and upload it to Gmail when you compose a message.
Should other pages of a document have a letterhead?
In some documents, subsequent pages must have a letterhead and a page number. Among those documents are legal contracts, advisory letters, letters of complaint, and other multi-page formal/corporate documents.

