How to Use Compressor Apple Final Cut Pro
Final Cut Pro projects can be exported in a flexible way by using the Compressor which is a professional transcoding application for Apple Final Cut Pro. The Compressor can also resize frames and retime controls to enhance frame size and rate adjustments in output files.

How to Use Compressor Apple Final Cut Pro
The Apple Final Cut Pro’s Compressor is a feature that enables users to create or customize an export setting. Projects exported using the Compressor Settings enable the transcoding of projects without opening it in the Compressor.
-
Step 1: Create a New Destination with the Use of Compressor Settings
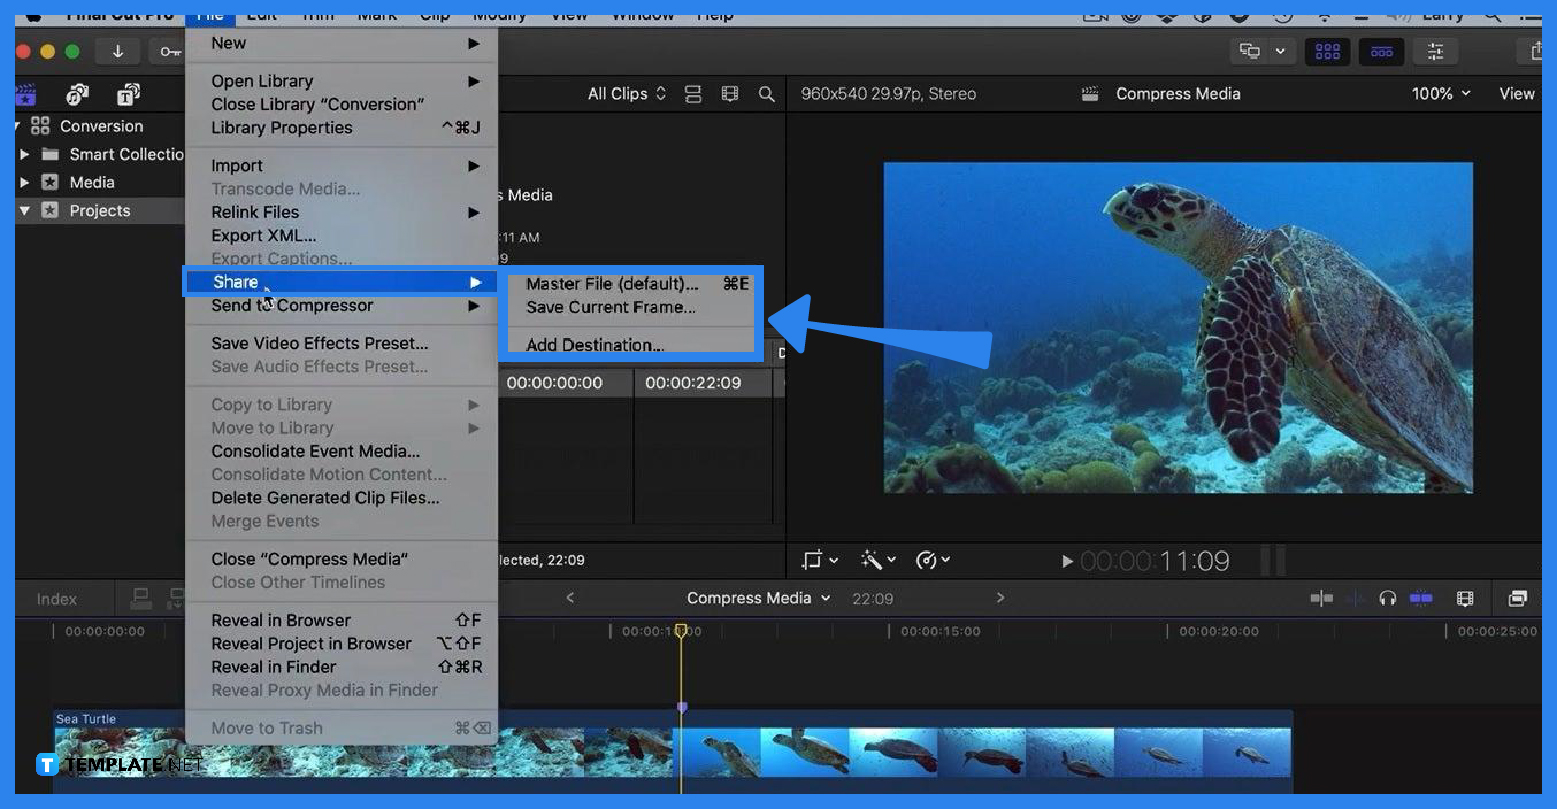
In the Compressor Settings, you can add a new destination by clicking the File tab, choosing the Share option, and selecting Add Destination. You can drag a new destination to the Destinations list in the Preferences window of your Final Cut Pro.
-
Step 2: Select One or More Projects, Clips, or Ranges
In your browser, you can choose one or more projects, clips, or ranges in a clip. For shared projects, open it in your timeline, click the View menu, then choose the Optimized/Original option.
-
Step 3: Click the File Tab

After choosing a clip or project, click the File tab in your Final Cut Pro located in the upper-left corner of your window. Click the Save option to choose the destination you created in the first step. -
Step 4: Click the Settings Option
At the Share Window, click on the Settings option so you can confirm the export settings or make further adjustments. Then click the Next button to enter a name for your file.
-
Step 5: Choose Destination and Save the file
Another pop-up window will appear on your screen. In this window, choose the final destination of your file, then click Save.
FAQs
How do I create a New Destination in Final Cut Pro?
To create a new destination, choose the File tab in your Final Cut Pro, click the Share button, choose the Add Destination option, then at the pop-up window, drag your selected destination to the Destinations list, and modify the settings for your new destination.
What are the different types of destinations in Final Cut Pro?
The Final Cut Pro application has two types of destinations which are the Web Destination and the Compressor Settings Destination.
How can I send a project or clip to Compressor?
To send a project or clip to Compressor, click the File tab, select the Send to Compressor option, then conduct a configuration by clicking the Add Outputs button and clicking Start Batch.
How can I send an iTunes Store package to Compressor?
Start by selecting a project or clip in your browser, selecting the File tab, and clicking the Send iTMS Package to Compressor button.
What should I do if my project contains iTT captions?
The Apple Final Cut Pro provides a list of iTT language sub roles which are the Translation which is used for a full translation of all words spoken in the video, Forced if the person in the video speaks a different language, and Deaf and Hard of Hearing (SDH) which is used for a full translation of all spoken words, song lyrics, and sound effects.

