How to Export Apple Final Cut Pro to MP4
If you want to render your video in smaller file size, then learn how to export Apple Final Cut Pro to MP4. That way, you can save some space and avoid handling a bigger file.

How to Export Apple Final Cut Pro to MP4
Exporting MP4 files from Apple Final Cut Pro only takes a few seconds. Follow these three steps to get it done.
-
Step 1: Click ‘File’, ‘Share’, and ‘Master File’
Go to your menu bar and click on the following: File, followed by Share, and Master File in their dropdowns. A dialog box will then appear.
-
Step 2: Set Export Preferences

On the dialog box, you can set the preferences you want before exporting the video into MP4. Click on the Setting tab to change the default preferences. -
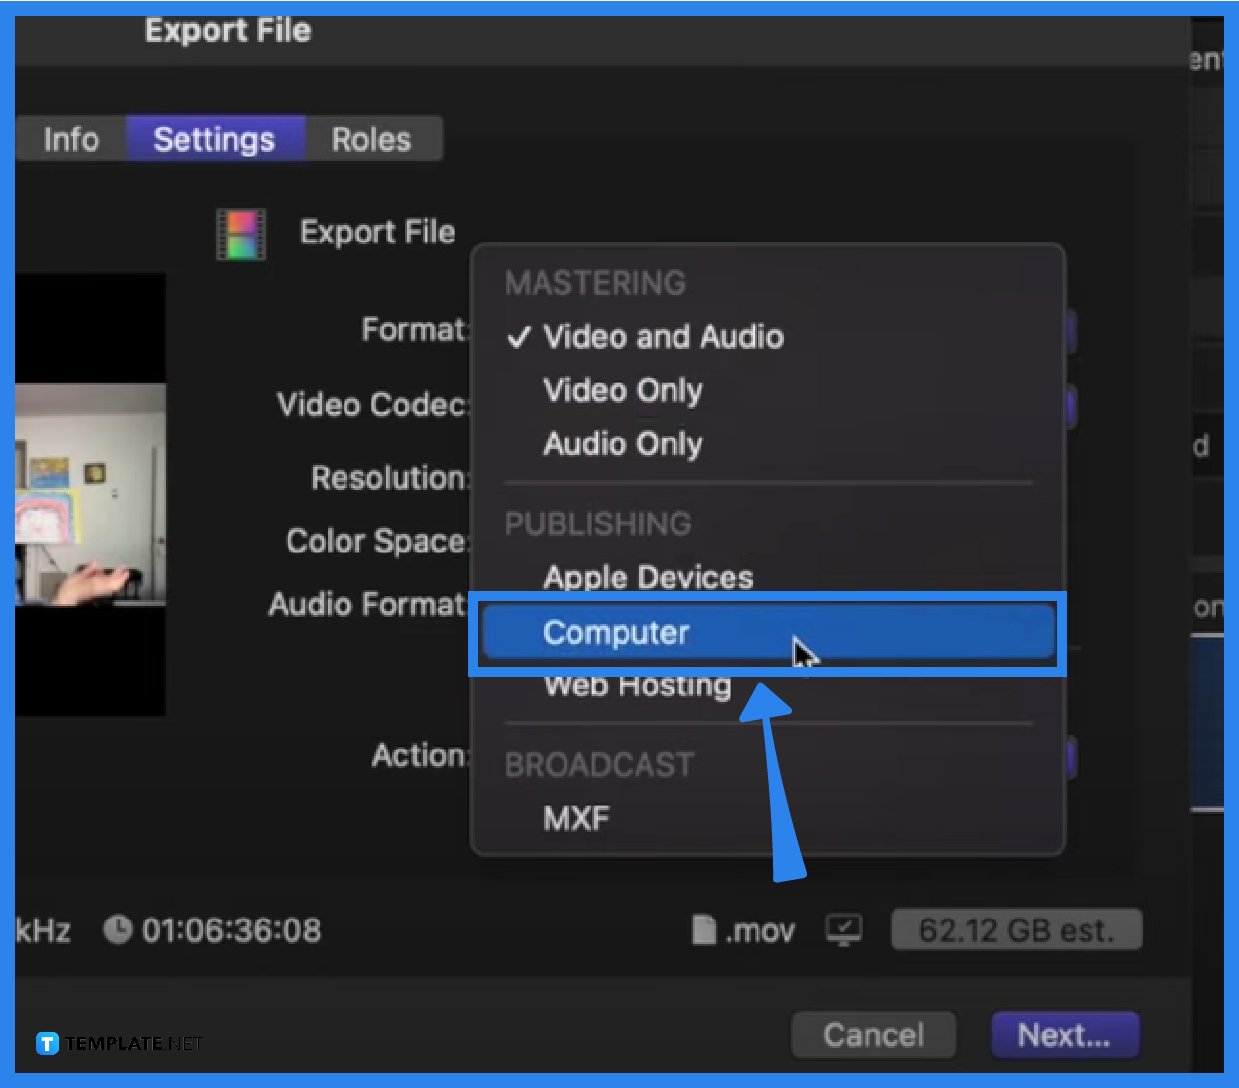
Step 3: Change Format to Computer

Go to the Format dropdown and change the setting from ‘Video and Audio’ to ‘Computer‘. This will change your file format to mp4. You can click Next and another dialog box opens. -
Step 4: Name Your Video file and click Save
Name the file of your video and place it in whichever folder/destination you wish. Then click the Save button. And that is how you export your Apple Final Cut Pro to MP4 format.
FAQs
What is one reason why users export Apple Final Cut Pro to MP4?
One reason is that the default file format in the exporting settings results in a big video file size.
Can you export more than one video file to MP4 at the same time in Apple Final Cut Pro?
No, you can only export one Apple Final Cut Pro file into an MP4 at a time.
What is the default file format in Apple Final Cut Pro?
At the time of this writing, the default file format for exporting videos in Apple Final Cut Pro is .mov.

